Cas-Database Tutorial
1. Overview
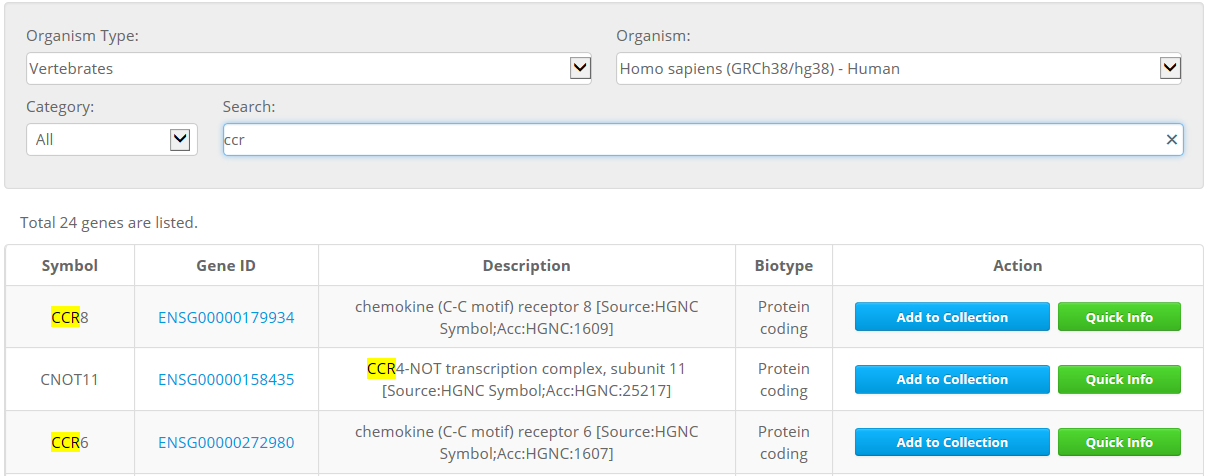
Cas-Database provides a simple and easy way to design optimal guiding CRISPR RNAs (crRNAs) of SpCas9. All available genes in all coding sequence (CDS) regions from a selected organism are listed on the main page of the Cas-Database website. Users can easily search for desired genes by querying with the gene symbol, Ensembl ID, or gene description as below.
2. 'Quick Info' function
Cas-Database provides an easy way to preview crRNAs that target a specific gene. Clicking on the 'Quick info' button immediately provides detailed information about the gene, transcripts, and targets in a new dialog box as below.
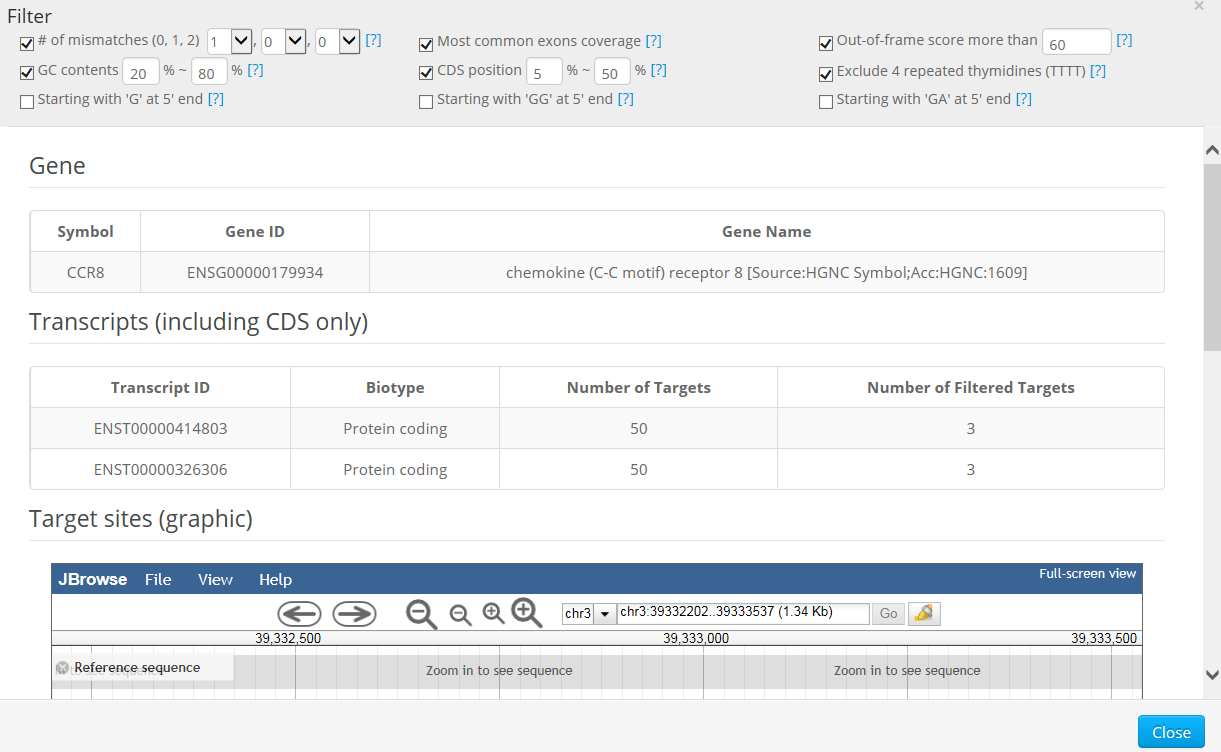
Basically, the 'Quick Info' function is useful for selecting crRNAs manually for each gene; one can easily preview all available targets in a specific gene by clicking on the 'Quick info' button.
3. 'Add to Collection' function
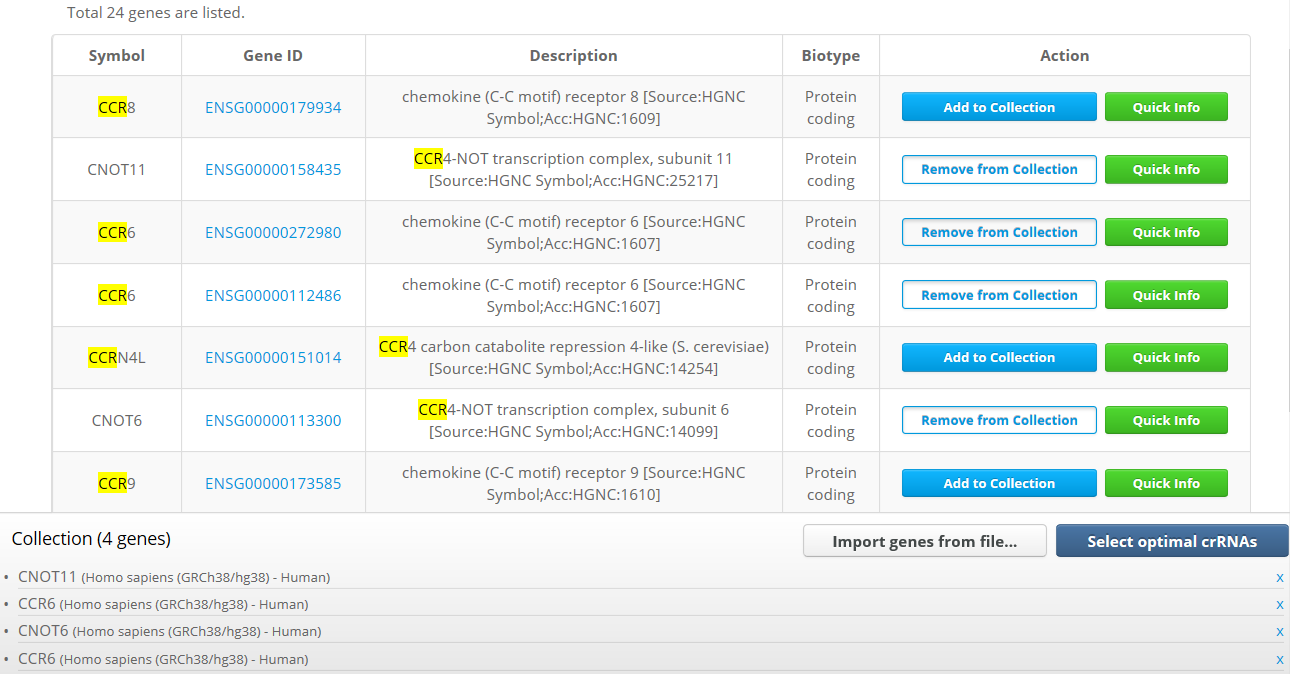
Cas-Database also provides a novel function that allows the selection of crRNAs from hundreds or thousands of genes at once through the use of a 'cart' system. Users can either collect desired genes on the main web page by clicking on the 'Add to Collection' button or by uploading a text file ('Import genes from file...' button in the bottom of web page).
4. Result Page
After all desired genes are collected, clicking on the 'Select optimal crRNAs' button will open the results page, which will list all available crRNAs filtered by the default conditions. Users can easily change the filtering conditions, including the total count of crRNAs for each gene, in the filter section that appears at the top of the resulting page.

Whether enough crRNAs have been selected for each gene after filtering is indicated by colored indicators – green (selected completely), yellow (selected partially), or red (not selected at all).
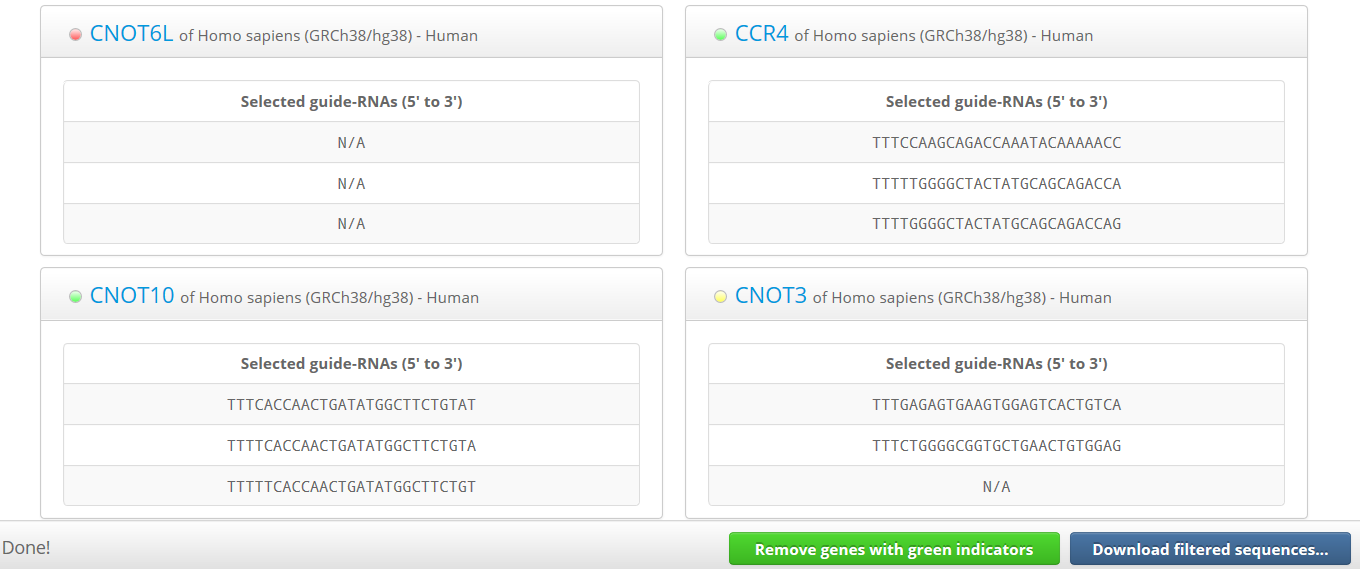
In this step, users can download either sequences for all selected crRNAs targeting each gene or for some crRNAs selected completely from each gene with a green indicator. In other words, users can download sequences only for genes for which crRNAs were selected completely under the initial filtering conditions.
After that, users can eliminate genes with green indicators from the list by clicking the 'Remove green genes from list' button, and then can alter the filtering conditions again. After resetting the filtering conditions, users can download the genes with green indicators again and repeat this process until crRNAs have been selected completely in the most remained genes.
Finally, if a few genes are still left, users can manually select targets for those genes by using the 'Quick Info' dialog.
5. (Tutorial) Example of guide RNAs selection at large scale
STEP 1. Select desired genes by clicking on the 'Add to Collection' button or by uploading a text file (use 'Import genes from file...' button). Then, click on the 'Select optimal crRNAs' button.
STEP 2. If users want to select 3 crRNAs for each gene, use the default values as below.

Download sequences only for genes with a green indicator by clicking on the 'Download filtered sequences...' and 'for genes with green indicator only' button sequentially. Then, remove selected genes by clicking on 'Remove genes with green indicators' button.
STEP 3. For the remaining genes, alter the filtering options as below.

Next, download sequences only for genes with a green indicator again and remove the selected genes.
STEP 4. Repeat above processes with less strict filtering conditions as below.

If you uncheck the 'Number of mismatches' option and 'Most common exons coverage' option, crRNAs will be selected sufficiently from almost all genes.